Showing posts with label City and Guilds. Show all posts

Wednesday, 6 August 2014

Work in Progress Wednesday - 6 August 2014

The management are delighted to announce another misnomer of a Work in Progress Wednesday post, because: THE FEATHER IS FINISHED!

YAY!

The bottom is a little odd, but I decided that nature is rarely that 'even' and, whatever it looked like, it was finished!

I am now officially UFO free.  Not that I ever had many, just this hanging around from my C&G days back in autumn 2008 and a few painted canvas needlepoint kits from childhood (25-30 years old!).  The only thing I have now that's in any way started is the butterflies 'spring' piece that I made a rotten start in silks on back in April, then took all the stitches out.  I plan to work that one this month, but as the actual stitching's unstarted, it can't really be classed as unfinished either.  It's more like having a kit in stock, or a printed design.

Actually, I finished the feather a few days ago and have been busy clearing the sewing decks since - altering 4 pairs of trousers (NEVER again!) and making up the Hanako cushion (look out for her at the weekend....).  I'm wearing one of the pairs of trousers right now, the other three are residing in my recently cleared out wardrobe and Hanako is almost finished, just need to complete the zip insertion, which I'm part-way through, and then sort out the ends of the bottom seem.


So, what am I working on stitch-wise at the moment?  This is as far as I've got with anything:


An R&R frame loaded up with some 28ct black Jobelan!  Inspiring and informative, no?=)

Here it is again with some threads on it.  A floss toss, no less!


In case you're wondering what this little collection is all about, then look no further than the following image, a design from exactly the same cross stitch magazine as the Tudor Lady!


I thought it would make a nice scatter cushion for Sir's room.  Mine won't be precisely the same as some of the sky in the original is unstitched as the piece was designed in delft blue Aida, which is no longer made.  Also, I don't much like working on Aida anymore (except for blackwork, which I'm still in the infancy of) and SewandSo had no suitable blue evenweave available, so I thought, 'Bubbles to blue.  I'll do it on black.'  Also, I've changed some of the shades of blue and will finalise the greens as time goes on.  I'm very sensitive to greens being just so.

So, that's the next WIPW project.

To see what others have been doing this week, click on over to Pintangle and even leave a link of you own of work you've been doing on a large project.  WIPW is a kind of weekly Weight Watchers weigh in for stitchers and is very handy for providing the impetus to get on with a project that may have been dragging for a while, or even a UFO.  I find I have a lot more motivation as I want to post about it each week and have already finished quite a few things that may have otherwise got neglected.  I'll do a WIPW review soon.=)

Yes, Glenis, I could be persuaded to complete one or two of your projects, as long as I like them and I don't have loads of things that I need to get on with, that is.

Right.  Time to get away from my laptop and get Hanako's zip fully done and then, wow! I've nothing more in progress!  Clear decks.

Wow!

Text and images © Elizabeth Braun 2014

Wednesday, 30 July 2014

Work in Progress Wednesday - 30 July 2014

Just the usual quick check-in today with my WIPW progress photo.

As you can see, I've been working a little on the right hand fronds.  I estimate there to be something like three hours work left in this piece and then I'm a totally UFO free zone.  Hurrah!  In fact, one the Hanako cushion is sewn up, there won't be anything half done (oh, unless you count the camera case I've been meaning to sew for the past 5 years and have got no further than cutting some bits of fabric to use.)  I've decided to complete this before starting my new cross stitch etc etc....

I would have had it mostly done by now, but I've ended up in bed again with another bug.=(  Still, I usually feel a little better in the evenings, so maybe I might sit up for half an hour and work on it later on.

I actually feel quite keen and motivated and, since leaving the remaining left hand fronds for later and starting on the other side instead, I feel so much closer to the finish line.  Hopefully I'll display the completed piece next week.

As always, you can find out more about Work in Progress Wednesdays and see what others have been accomplishing lately over on Pintangle.

Text and images © Elizabeth Braun 2014

Wednesday, 4 December 2013

Work in Progress Wednesday - 4 Dec 2013

Helloooooo!

I'm in a good mood today.  After being able to collect Nectar points on e-bay for a while already, now one can finally spend them there too on a the same sort of voucher system they used to use for Amazon.  That means that I was able to get my own copy of the Trish Burr colour book as well as the Redouté flowers one for fewer points that it would cost me for the colour book alone on Nectar's own books affair.  Even if I'm getting something for free, I want to get the best value out of it!!  I get a fair few things via e-bay, as one can often get hard to find and discontinued products there.  So, consider me well pleased!

So does the fact that I'm on the home stretch of this L*K piece.  Just one more leaf, three leaf stalks and the 'Autumn' logo to go now...

Here's the cute kitty bit!


This is as far as I've got with the peacock feather, i.e. got it all laid out on my desk and getting in the way.  I haven't put in a stitch on it yet, but I have cleared it out of the way a few times...  I'm planning to do a little on it when I've finished this posting.  Wonder if I will....??!=)

My stitching goals for this month look like this (complete with status thus far):

* Finish the L*K 'Autumn' piece  - About 85% complete and must be done this week as it's listed on e-bay and has been bid on already!
* Finish the peacock feather - Hoping to complete the left hand side before next Wednesday's update.  I do actually believe in miracles (esp as Sir actually managed to get hold of his teaching certificate mentor on the phone the other day!!), so this may even happen!  PS - it did!  I put in two lengths...=)
* Finish the red alpine rose tiny needle painting - Just the stem done so far.
* Re-work the DMC ladybird stumpwork design
* Mount and display all five DMC stumpwork pieces.

I should be able to manage that lot, but whether or not I will depends on a combination of self discipline (laughs wildly) and successful avoidance of germs.  I can't really stitch when I'm horizontal in bed!!

That list should have answered your question, Wendy.  Yes, I'll be totally reworking the ladybird piece as, even if I was willing to break up the card, there wouldn't be enough fabric to mount it on its cardboard square.  It shouldn't take too long to do and I can turn the wired ladybird into a blog tutorial shortly afterwards.  Look out for that one some time within the next six weeks or so.

Juno asked if lacing the sampler was my first attempt at it.  No, it's my fifth one.  I got the instructions from the back of one of Helen M Stevens' books, probably one of the 'Masterclass' series and just followed those.  This piece here was my first and I've also done two cross stitch pictures that Sir then mounted in spare frames and which are now hanging in our home.  The other piece was the one I used as a tute for mounting finished pieces into a plastic flexi-hoop frame.  The technique is very similar although it's a rounded edge finish instead of a square or rectangle.  We got a quote for the final framing of the sampler yesterday and should get that sorted very soon indeed.  Looking forward to getting it to my mum as soon as practically possible.

Right, best crack on!

Text and images © Elizabeth Braun 2013

Wednesday, 13 February 2013

Work in Progress Wednesday - 13 Feb 2013

I've been looking forward to Wednesday this week so as to be able to post about all these projects!  This makes a pleasant change as, so often in the recent past, I've been wondering what I was going to scrape together for a WIPW post!!

Again, I've worked on all three projects and made what I feel is significant progress with them all.=)

First up, the old peacock feather. This one is progressing the most slowly, but then I actually work at this one at my desk as it's helpful to have the table there to both lean the hoop on so that I have both hands easily free to control the springy rayon threads and also somewhere to lay out said threads without having to put them in an awkward place.  It's not as easy to work in there at times.

As the Chinese say, 话说回来 (speak speech come back - 'having said that'), I have done some on it and feel that it's beginning to take more shape now.  There's still plenty to be done (sigh!  I'm longing to get this one off the list!), but it's coming along at long last and that's all to the good!

Now, on to the rabbit and here's a little someone whose also taking shape rather well.  First, I finished off the shading (although a few more pieces were put in after this photo to plug up a few gaps and thin patches.


Then along came the fluffy tail!  I took a lot of WIP photos of the process, so there'll be a tutorial coming up on how to make fluffy patches, i.e. ghiordes knot stitch.  There are some more to do for the garden patch of this piece, so I'll wait until that's done and I can show more uses of the stitch.


This is the detached ear in progress.  WIP photos are also collecting nicely for it so that I can do the long-delayed 'wired fabric elements' tutorial as a complement to last year's popular 'wired needlelace elements' tute.  That'll come when the butterfly (next stumpwork project) is done and, again, various uses can be shown.

Now for the sampler and I've had a very green week where every single stitch has been green!  This series of three photos shows how much work was done in each of the three sessions I've spent on this piece:


Finally, here is the overall look of the piece right now.  It looks a bit dark towards the top as the fabric is loose there just now - I only put the top gripper on when I'm working on it so as to reduce pressure on the stitches there as some are covered by it.


This coming week will, I hope, see the rabbit piece finished, the left hand side of the feather done and the rest of the green work completed on the sampler, which includes replacing the lettering with dark green.

What have you got planned for this week?

Text and images © Elizabeth Braun 2013

Wednesday, 6 February 2013

Work In Progress Wednesday - 6 Feb 2013

Wow, look!  I've got progress photos on all three projects to show you today!  I'm delighted!=)

First of all, on the left you can see the current status of the peacock feather piece.  I put in two lengths of green-mix couched threads along the left hand side, also adding a little bit of satin stitch where they meet the 'stalk' so as to fill in the gap a little and create the right shape.

The next move is to add in a more brown row and then to do the fronds that begin to splay out somewhat.

It's not easy doing a peacock feather as so many of the colour changes are along the fronds, (or whatever I should call them - I'm no ornithologist), so it's not really possible to get them exact - unless one were to specially dye threads for the design.


Next is the turn of our lovely, cute, chubby little bunny.  As you can see, I made quite a lot of progress on him yesterday (you get a lot more done by not watching TV at the same time....) and hope to finish the shading completely during the next session I spend on him.  Then it's on to the ghiordes know tail and I think I'll make a tutorial out of that, so I'd better do it in good light!=)


Last, but by no means least, is the sampler.  Yesterday afternoon I started and completed the extra trims on the rose cross stitch area that I showed last time.  There are two shades of beading, two fly stitch leaves, two spider's web roses and a few lazy daisy stitch petals.


Here's the full length of the piece as it stands right now.


As I'd got about as far down on the piece as I could go, I've moved it up in the frame now.  I'm not sure how well that will work out as I don't think it's far enough up, but it can't go any further thanks to the beading on the top section.  I may well have to re-transfer it back to the 17" side bars, which fit in the whole design.  We'll see how it feels as before I didn't find it comfy working in such a very long frame.

I've decided I don't like the colour of the lettering.  It doesn't look as bad here, but in real life the purple is too red and doesn't match well.  It looks fine on the lilac background, which is an alternative on the pattern, but I think that, on green, the lettering should be either dark green, brown or even grey.  I'll wait until I've worked the rest of the surface elements before making a final decision on colour, but it's not staying as it is.  I just don't like it at all!

Something else I'm not sure of now is what colour to work the girl's dress in.  She's to appear in the space on the left of the square and the pattern states a blue dress, but I don't really think it goes well with the rest of the colour scheme (nor do some of the lupins, which are also supposed to be blue, but that I will be changing to be pinks and purples as on the cream based version of the design) and am considering changing it to light yellows instead.

So, over the next week I hope to complete the left hand side of the feather, the body, tail and perhaps also the wired ear of the rabbit and press well on with the rest of the pictorial part of the sampler.

I've also selected my next WIPW big project as, according to the challenge guidelines, the project should be at least 20 hours long and so, for starting new ones, I want to make sure that WIPW is my weekly larger project update.  So, after the sampler come a pair of rather nice cross stitched ladies - one medieval, one Tudor - with all sorts of fancy elements including rayon threads, beading or various sorts, petit point faces and hands and so on.  So, not your ordinary cross stitch, but with something a little special.  NOT that there's anything wrong with cross stitch!  I remembered feeling quite disgusted when someone spoke disparagingly of 'cross stitching bears'.  All forms of embroidery are worthwhile and valid and it doesn't matter who designed it or whether it's worked for fun or for serious business, commission, study or exhibition.  The only time I would find something questionable would be if the subject matter was distasteful in some way.  So there!  Cross stitch is great!=)  I love all forms of stitchery and am happy to indulge in any that take my fancy at any given time.  No snobbery allowed here!!!LOL :)

Text and images © Elizabeth Braun 2013

Wednesday, 18 July 2012

Almost finished up now...

I can't believe it's almost two weeks since the last post.  Tempus fugit, no?  (That's 'time flies' for anyone with even less Latin than me!!)  Anyway, although I decided to give myself a bit more time to complete the hardanger cushion cover, it's not got stalled over much and is still coming along well.


First of all, I completed the embroidery by adding in some filling stitches.  Here you can see square filet in most of the filled squares and some spider's webs in the others.  I used #8 pearl cotton for the square filet and #12 for the webs as planned and it looks fine.


Next, all the materials for the backing and finishing came out.  I had most of them in stock already, and had only bought the ribbon trim from an 'end of roll' 50p bargain bucket!  The yellow fabric is too thin to make a backing on its own, so I added in some old, cream cotton stuff as an extra layer there.

And then I laid them together to see how they looked


Finally, I got the machine out (yes, really!), and got on with the assembly.  Here you can see it as it stands just now, only needing the zip inserting.  I would have done this last week as planned, but the 12" (30cm) zip I had in stock was really too long and too awkward to fit in, so I went and bought a 10" (25cm) one yesterday.


Kate asked my how I kept my working fabric straight and taut whilst embroidering.  Well, I use R&R craft frames, sometimes also Q Snaps and, of course, old fashioned wooden hoops at times.  For this project I used the 14" R&R frame.  These are a British made tool and come in 6", 9", 11", 14" and 17", whereas the US made Q-snaps are on sale in 8", 11" and 17" (I think - don't own this last size).  All except the 6" R&R frame come to pieces and can be used to make up rectangles as well as squares.  The two types of product are incompatible though, so, whereas I could create the 11"x17" frame I'm using for my current sampler work from my R&R frames, and have done 8"x11" with my Q-snaps, I can't do a 8"x14" using one of each.  They're usually used for counted thread work, but I've often used them for surface work as well as I find they do hold fabric tight enough for that and sometimes the sizes are just far more convenient than a circle.  Hope that helps.

Good news:  Subject to a final financial 'review' in about 6 weeks, I should be joining back in with a City & Guilds Embroidery class from mid-September!=)  I'll be 'dropping back' to level 2 this time as it's less work and I want to do the Stumpwork syllabus alongside (the teacher has agreed to 'tick the boxes' for me).  Also, it gives me a chance to learn a few new things more slowly and, as it's only a one-year course, if I've had enough by the end of that, I can leave with a full certificate.  So, I'm looking forward to that very much!  I liked the whole style of my old place better, but after a really good chat with the local teacher at her students' exhibition yesterday, I think I can work quite happily in this arrangement.  Nothing's ideal anyway and I had trouble seeing how the old classes satisfied some elements of the syllabus too.  Whilst most of the pieces looked more contemporary than suits my taste at this new place, the teacher said we have freedom to be ourselves, so I hope to be more 'pictorial' in my samples and pieces than most are.  We'll have to see how it develops.

Non-stitching news is that I've also been invited to help out with a new textbook on English-Chinese translation for final year degree students.  I'll be proof-reading the English - which means more than just checking grammar, it's also checking 100% correspondence with the Chinese text and also making comments on the actual content.  I'm really excited about this one.  I'll have my name in a language textbook in the acknowledgements section - yippee!!=)  To be honest, I'd rather do this than make kits....

Text and images © Elizabeth Braun 2012

Friday, 9 December 2011

Why I'm Looking Forward to TAST 2012

If you haven't heard that Sharon B from Pin Tangle is re-running Take a Stitch on Tuesday next year, then where have you been??!=)  Umpteen stitching bloggers have posted about it already, but in case you've missed it, then here's the challenge home page and there's also a permanent link to it in my sidebar.

So, there'll be a different stitch posted and demonstrated each Tuesday, giving a whopping great 550 (and increasing) stitchers the chance to learn new skills and find new points of departure for old ones.  For some, almost every stitch will be a new challenge as they're new to surface work.  Others will revisit old friends and make new and yet others will just join in for consolidation and fun.  I fall into the middle group really as I have a passable repertoire, but still have plenty to learn and discover.

What I'm really looking forward to about it is not actually the learning of new stitches - as I have a number of stitch guides and I learn stuff here and there when working new styles/designs etc and that's fine.  I suppose I learn what I need to as and when I need it.  For me, the big thing is a bit beyond that -more into creative design and usage of the stitches covered.  In effect, I'm looking at it as a sort of City & Guilds samples project revisited.  Throughout this posting, you can see some of the small pieces I did whilst working on the City & Guilds level 3 certificate in embroidery, (which I, sadly, wasn't able to finish) and you may have seen already on my C&G page here.

Working through the design module and samples project, we had five design elements and five major themes, broken down into smaller areas each time and a type of work and/or number of stitches learned with which we were to interpret our designs.  To make that clearer, the syllabus requires that you cover line, colour, shape, form and texture.  Our teacher chose big themes for each area, so line was living creatures, colour was gardens and flowers, texture was buildings, shape was Art Nouveau and form was landforms.  Each week we then had a smaller area to produce some artwork and a design from which we would then interpret in textiles and suitable stitches.  Here you see my shell as part of the line module interpreted in linear stitches.  Above are samples from the colour section, one topic being flower borders, which was then worked in knot stitches on painted silk and other was hedgerows being worked with broderie anglaise stitches.

What I'm trying to say here is that I would like to do something like that again.  I think it will take a few weeks of the challenge to see how well it can be achieved as I don't know how much can be done in this way with just one major stitch (although there's no reason why one can't use others to support it, as long as the main TAST stitch of the week is the central thing, no?), and I'll have to chose my own themes and topics, which could lead to less creativity in that I may just settle for the easy option instead of challenging myself like the C&G classes did.  The sample you see here is a section of snakeskin done in loom bead-weaving!  I was rather disappointed when I went to the local C&G micro-centre last summer to see their exhibitions and could see none of the obvious design inspiration that I was used to from my old course.  Everything looked like shapeless masses of stitches instead of resembling something and that just wasn't what I wanted...=(

I also want to use more of the lovely fabric colouring things I bought for the C&G course, such as these silk paints, fabric paints and dyes.  I also have watercolour paints, which Kit Nicol (amongst others) uses in her pieces to colour her backgrounds, and some Derwent Inktense pencils, which can be used in a similar way to silk paints and dyes.

Here's something quite novel that I thought would make an interesting fabric colouring method.  Can you tell what it is?  To the left is the matte palette and on the right are the shimmer shades

Yes, you're right!  It is, indeed, eye-shadow!  And look at all those useful brown and green shades!  I got these two palettes on e-bay and, aside from the feeling that they could have made more of the 88 shades they had (given a better spectrum, and certainly fewer greens!!!), I love them and am keen to put them to other uses than what they were originally designed for - although I like them as make-up as well.=)  Despite being quite cheap, Chinese made products, they're actually quite good and, with a layer of primer, last surprisingly well and have plenty of pigment so give a good colour pay off.  Not that I've been brave enough to use that vibrant emerald green on my eyes...

Speaking of things Chinese, I'll leave you with this wonderful example of Oriental initiative and multi-tasking.  Here's one of our Chinese friends, Yufei, selecting from the menu, whilst balancing her 4 month old son's bottle with her chin.=)  Priceless, isn't it??

And it's snowing.....

Of course, by the time I'd finished the fine-tuning of this posting, the snow had stopped and the sun came out!!!=)  Never let it be said that British weather is monotonous!

© Elizabeth Braun 2011

Saturday, 23 January 2010

Thoughts on studying embroidery

Over the past couple of weeks, I've been doing a lot of on-line research into formal embroidery studies, mostly with City & Guilds, but also with the RSN and even higher education level things. It seems that there are ample opportunities for City & Guilds study with plenty of in person classes running all over the UK and also a few decent distance learning opportunities. Sadly, WS-Touchbase is finishing City & Guilds at the end of this year and there are fears that that would see the end of the stumpwork programmes.=( However, as DH is wanting to move somewhere where I've found a recently opened studio offering Levels 2 and 3 Embroidery Certificates and also the Level 3 Diploma, I could also go to classes later on as well - when we get back home.

I was disappointed to find out just how much the RSN's courses were though. I knew they were expensive, but found out that they were 2 or 3 times as much as I'd thought! Each technique is £960, with 4 needed for the Certificate alone! On the good side, they don't charge more for paying in instalments and you can pay for one technique at a time without ending up, as with some on-line schools, paying almost twice as much as someone who can pay the full figure up front. I was rather shocked at how much the School of Stitched Textiles wanted for buying one module at a time for their Level 3 C&Gs. It was something over 210% of the up-front price! Anyway, maybe I can do the RSN Cert later on, fairly slowly, but I daresay the Diploma at nearly £8000 is going to be beyond me. We'll see.

Now I know what to expect of a C&G course, I feel in a better position to plan and prepare for taking one - hopefully more than one. I also know what sort of workload and time frame is expected and have a much clearer idea of where I fit into that pattern. A very important aspect I've got from it is that Level 3 courses, despite claims to the contrary by several course providers, are NOT suitable for beginners in embroidery, (unless one is very experienced in art/design and sewing). I wasn't a beginner when I started, but I would have been paralysed by the level of work expected if I had been. Basically, C&G, esp Level 3 C&G, will not really teach one embroidery as a skill. Ideally, it teaches someone who already has a decent grounding in embroidery, design skills and practice, along with introducing some of the more contemporary textile techniques. In order to succeed without a large amount of stress, I wouldn't recommend anyone, other than someone of extraordinary confidence and huge amounts of time, to start that level of course without having a good bit of experience of working others' designs and also of a bit of basic sewing and machine usage. Working the assessment pieces requires that you have to make those embroidered pieces up into things like bags, hangings and so on which you're to have designed and prototyped yourself, and, if you've next to no experience of construction techniques, then this part is only going to add to the stress.

So, my plan is to consolidate my own stitching skills by working as many of the kits and designs that I've brought with me as I can, to have a go at making up some little bags etc (I've brought a book with me and the stuff needed for my camera case), and to work on my drawing and painting skills as well as collecting plenty of design source photos etc. In addition, were I to do the Level 3 Diploma, there's a lot of more academic work to be done in creating the History of English Embroidery project as well as the embroidery traditions of 3 countries, so I can also make a start on collecting info etc for that. There's a fair amount of 'folder work' to do in terms of design, ie colour theory stuff, line and mark making and all manner of things too that I can begin to get done working from the syllabuses. Having said that, I plan to start with a Level 1 or, max, Level 2 anyway!

Higher education level courses, by and large, don't really appeal to me as they're very much contemporary styling and there's only the RSN's FDA (foundation degree) in Hand Embroidery that looks up my street. The location is in London at Hampton Court Palace, it would be horribly pricey and I'll have to shelve that sort of idea until they've got the course well established (it started new this year) and offer it in more formats and locations. Again, we'll see, but no holding breath on this one, which is a real shame as they specialise in what I like best! I did read Tanja Berlin's account of her time at the RSN on their former apprentice programme and it was fearfully intense, so that's another downside. 9-5 daily with up to 5 hours expected per evening. Basically, you'd sleep and stitch. No time for anything else! Still, there are plenty of good books around, even though I was only able to bring what you can see above with me. Oh, how I miss my books and the rest of my stash! Sigh! Still, looks like we may well be home by the end of this year, so I reckon I can make do until then and I can get 'Inspirations', 'Classic Stitches', 'Stitch with the Embroiderer's Guild', the Italian mag 'Rakam' and several cross stitch mags out here, so that's a big comfort.

The photo at the top of this post is the back of the needlecase, which I got completed yesterday. I hope to have the full thing stitched before the end of the month and then hope I brought the doctor's flannel needed to put the 'pages' in. Last night I also added in a side bar feature of my 2008 stitched pieces, so more eye candy on permanent display, but you need to visit the blog 'for real' to see them as, of course, reader software won't show them up, even Bloglines. Does anyone know why Bloglines displays your header photos in reverse order??

Thursday, 21 May 2009

End of Year Exhibition

I've just got back from College where I had the pleasure of looking at all the work that's been produced this year by the City & Guilds class. The 2nd and 4th years had their own displays, whilst the work of the 1st and 3rd years was part in dedicated areas and part mixed in with the larger displays. It was very impressive! I only had one display board that, perhaps owing to my having been unable to go to help set up on Monday, got put in a corner rather than on the wall, but it was good to have something there at least!!


Here's Alison, one of the two 4th years, with her display of assessment pieces and design work:

This is the table holding many of the 3rd years' portfolios containing their History of English Embroidery, 3 other country studies and design research work based on a personal theme, which included fruit & veg, bark, ferns and dragonflies.

Here are two of the 2nd years' displays showing their assessment pieces and the design and sampling work that went with them.

This is Felicity with her 2nd year work display. She did the loveliest little stumpwork cube, which you can see bottom right with the sides let down.

The next three pictures are mostly 1st year work showing both purpose done wall displays and also many of the boxes, portfolios and handmade folders that design and sampling work was presented in. You can see mine in the corner of the second photo.


Sorry about the quality - the camera I'm using is very poor indeed and I'm looking forward to getting my new one soon!

I saw one or two of the visitors' comments that they'd put in the guestbook at the entrance and it was nice to be part of a group described as 'local talent'.=) Most of that rightly goes to the other ladies though. My part was the smallest in the whole class and didn't even get my name put on it (=(), but I rectified that by adding one of my own cards to it!!

I also picked up a leaflet describing the new course and it sounds quite good - well put together and in a sensible order. The whole structure has changed almost beyond recognition, but I think I could manage to do the 7113 certificate in the future. At least now I have a much clearer idea of what's expected and that will be a big help!

Thursday, 14 May 2009

Last C&G Sample and Colour Display

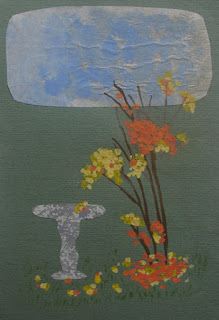
This is the last of the Samples Project I'm able to share with you. Today was the last working day at College and I really only went to prepare my display, which took most of the day to mount!! This sample was meant to be of manipulated fabric techniques, but I confess, I didn't finish it and get to that part. I've posted this one before to some degree, but here it is in the full line up. The sources were a sapling opposite our flats and a bird table I found on-line. Here we have a pastel picture of the two together, then a collage using painted papers etc, and then the sample which is worked in over-dyed threads (yes, GAST and WDW) on a fabric painted background. A bit lurid and makes it look springlike when it's meant to be autumnal, but it could be worse!!


Below is the Colour Module display that I've done for the College end of year exhibition next week. The photo was awful as my new camera just won't take indoor pix without blurring them horribly. I couldn't manage with the old one - having to hold the battery door shut - in the middle of the studio etc. DH is getting me a lovely new one that will take pictures in dim light and all sorts - great for museum collections where photography is sometimes allowed, but lights are low and flashes a no-go. I just got this pic to show it all together. I think I'll try and take a better one when I bring it home and can use the old camera on it, but you can see how I put in white mounts for most pieces and also used some other colours of card and paper to tone in with the artwork and samples etc. Do you think it works?


So, that's it for City & Guilds for me for the foreseeable future. I'm not sure if I'll go back after our year away and re-start as the whole programme is changing and, whilst it seems somewhat less work and not too bad, I just don't know. We'll see.

Now that's out of the way, I can get back to some of my 'regular' stitching. =)

Wednesday, 13 May 2009

Some more artwork

Nothing stitchy to show just yet, (although I really must get on with some!), but here are some more of the art and design pieces I've done for my C&G work. Hope you like them at least a little bit. :) Paper-based art isn't my forté, (mostly as I don't do enough of it to develop any real level of skill), but I quite enjoy it anyway, which is the main thing.

This first one is a pastel painting of the centre of a flower which I did to be part of my colour resolved design work investigating tones and tints. This was the tints one - pale colours with 'white added'.

This one, obviously, is a collage of the Taj Mahal using fancy and metallic papers and card. The idea from here was to reproduce it with manipuated fabric techniques (part of the 'Texture' module) in trapunto. This was the one I tried to do using silk paints, but where the silver and clear guttas let me down to a mortifying degree and, after wasting a couple of hours on painstaking tracing of the outline - twice! - I had to throw the whole disaster into the bin in despair as the silk paint leaked through every single line of gutta! It didn't do that with the gold of the same brand, but the silver and clear, with their huge applicator openings that forced me to apply it with a paintbrush, were hopeless. I was, if you'll excuse the pun, gutted!


This last one is a piece of art nouveau jewelry which was to be reproduced in beads covering a large-ish button (just about an inch in diameter). It's drawn in pastel pencil, which I seem to do a lot better with than regular pencils of any type or colour and, I must say, I'd rather like a pendant like this!!

 
Google+