Showing posts with label RC. Show all posts

Friday, 25 July 2014

Ring Bearer Cushion/Pillow - completed project and the wedding!

Here's the finished embroidery still in the hoop.

Below is a close up of the lower leaf section, (about the only close up shot that came out well!!!)

The finished item from various angles:


Worked in DMC and Anchor stranded cottons, and Mill Hill petite seed beads.

You may have noticed that the first, in the hoop pictures didn't feature any tiny dewdrop beads.  Well, there's a story behind that!  When the stitchery was finished, I decided that it didn't need any other trims and decided just to make it up without beading etc.  However....

When I was pressing the flatwork from behind, the silk went all puckery and odd.  I knew it was nothing to do with the backing or the iron being too hot, but I didn't know how to solve it.  So, I tried steaming it with the iron.  That's when our delightful and rather ancient steam iron decided to spew out jets of rusty water all over my precious embroidery!  You can imagine the howl of horror I let out!  I'm glad Sir was in the States at an academic conference at the time as I may otherwise have wasted time taking it to show him the disaster.  As it was, I ran straight to the bathroom washbasin to rinse out as many of the marks as I possibly could under the cold tap.  I was more relieved than I can tell you that the vast majority of them came straight out.  Phew!

Next I pressed what I could of the un-embroidered areas with the iron on cool (and steam OFF!) and then put the whole thing back in it's original hoop and set it in front of my study fan heater to dry again.  Not only did it dry nicely, but it also pulled out all those original funny puckers!!  I was left with one or two light brown marks that most people wouldn't have noticed, but that weren't good enough for me.  So, I got out the petite seed beads and put one on top of each tiny mark!  I added a few more in certain unmarked areas to even things up a bit.

I won't try your patience with all the hassles incurred whilst putting it together, I'll only say that I had neither time, desire nor inclination to add the braids I'd made.  It really didn't add anything to the finished product and I was feeling a spot on the stressed side by this time.  Anyway, into a Tesco zip-lock freezer bag and then into a gift box it went, ready to hand over to the happy couple.=)


When I'd managed to calm fully down, I felt quite proud of my work and although one or two of the friends I told the near miss story to said, 'You shouldn't tell people that', I realised I wasn't only enjoying having a tale to tell, I was also rather proud of having done a good rescue job.=) LOL!

Here's the piece 'in action':


And here's the happy couple after the ceremony posing for their promised photo with their gift.=)

I really did learn huge amounts from this project.  As usual, that was more what not to do next time than anything, but it was a good learning process, if a little tense at times!

Now then, what's next up....?

Text and images © Elizabeth Braun 2014

Friday, 18 July 2014

Ring Cushion - moving towards completion

Of course, the whole cushion is already finished and handed over as the wedding is tomorrow at noon, but there are still so many photos etc, that I've decided to split the last stages in to two posts.

The first thing to do was to complete the smaller plant elements, leaf veins and stems that were left over from the stage you saw last weekend.  This is the first 'attempt' at it, but the pink main stems for the evening primroses, whilst they looked passable on the left hand side, were really wishy-washy on the right and were lost amongst the brighter herb robert stems.  So, my next move was to replace them with something darker and more easy to distinguish among a mass of stems.  I used one strand each of a green and a brown - the only part of the project worked in two strands.  Here's the result, complete with my dummy yellow paper butterfly.


Moving on now to the creation of the brimstone butterfly (in keeping with the yellow theme of the flowers for the ceremony etc).  After a false start trying to work some wings directly onto the yellow silk fabric that I used for the cushion back with some 34 gauge beading wire and some Pipers Silk floss, I decided to try them on a piece of fine cotton lawn, some white paper covered 30 gauge wire and good old stranded cotton instead.  I needed the fabric to be yellow all through, so as to avoid the all too common white edges that can be seen on some wired stumpwork pieces.  I remembered that my silk dyes could also be used on cotton, so I mixed together my warm and cool yellow shades to get something that would match well and soaked the fabric well with it.  Once it was dry, the whole thing was dyed through and I could attach the wires as you can see here.  The shapes were taken from Jane Nicholas' latest book, 'Stumpwork Butterflies and Moths', but scaled down a tiny bit.  (The body area I created myself with simple padded satin stitch and a few straight stitches.)


Here you can see the next stage, the filling in of the embroidery of the wings.  You can see that I added a little grey on the inner edge to try and make it as realistic as possible.  I carried this all the way through to the edging and that left me with a slight colour mismatch problem along the inner edge as you can see in this next shot:


Not a major problem though.  I found a silver gel pen that was just right for colouring in the yellow edges that were sticking through the grey and eliminated that problem altogether.=)  Here's the finished butterfly in position on the piece:


What about the whole of the finished piece?  Look out for that next week!=)

Text and images © Elizabeth Braun 2014

Saturday, 12 July 2014

Ring Cushion Progress


Just a quick post today to keep readers in the loop as far as the wedding ring cushion project is coming along.  The first photo shows where I got to last update plus the pink flowers completed, including the green sepal details.

This second shot is my desk when I was matching up the orange shade needed just a short while ago.  I never really felt happy with the first orange I selected, so I got out the colour chart and the bag with almost all the orange shades in and picked out a new one instead.


Here are the 'spikey' leaves, complete with orange sections (I nearly wrote 'segments', but I think that was a bit out of context here!!).  I'm much happier with this second choice of orange, which is less red and more brown than the first one, but still every bit as bright and striking.  For anyone who uses Anchor threads, my first choice was 332, but the one I finally used was 326.


Here is how I left it just 15 minutes or so ago.  As you can see, all the main elements except three of the four evening primrose petals have been put in.  Although I would normally do the stems first, I'm glad I didn't this time as the stitching has strayed over where some of the stems would otherwise have been and there are a few different colours needed for stems, many of which are leading out from central leaf veins (light grey-brown for the evening primrose leaves and orange for the herb robert ones), so I thought it would be easier to do all that together.


Next step is to complete the evening primrose petals and I don't mind admitting that I feel less than totally confident about that.  I've realised why my outer petal edges have often been uneven and it's because I've been giving so much attention to the directional element by adding intermediate guideline stitches, that the edges ended up suffering.  I managed to work this first petal quite satisfactorily, but I'm rather concerned about the right hand one which goes behind the first one and needs a great deal of directional work.  Still, if I fluff it, I can try again, right?

Then I need to figure out a good flower centre, put in all the stems and leaf veins, add the tiny beads and rustle up some kind of butterfly for the top left.  Five days to go and five just lost thanks to a virus that makes me weak and constantly feeling that I'm falling over forwards and just won't clear.  Still, it can, indeed MUST, be done in time, so I'm not giving up yet!=)

Text and images © Elizabeth Braun 2014

Saturday, 5 July 2014

Ring Cushion in the hoop (plus the wedding rehearsal!)

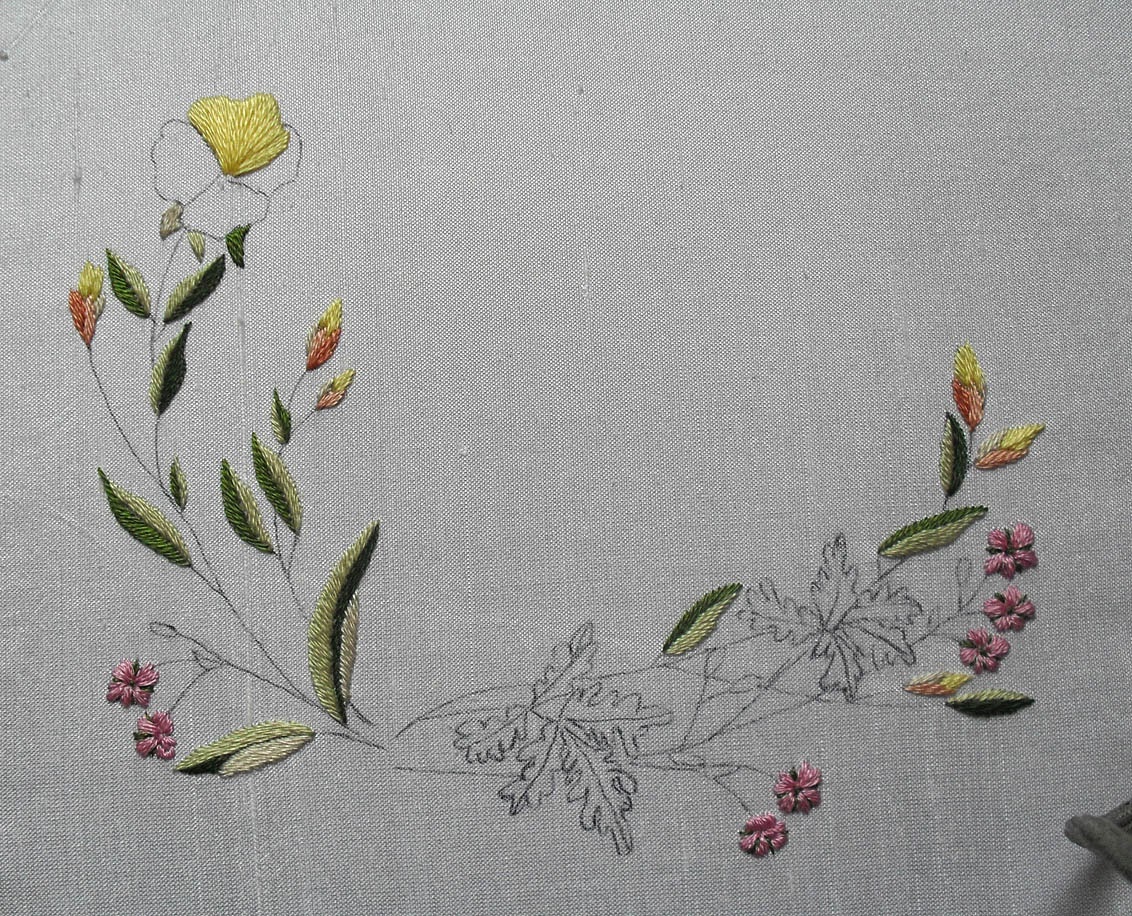
Sigh! I'm having a time and a half getting an even partway decent photo of the work done so far on the ring cushion embroidery! All the pictures turn out with fabric looking no lighter than mid-grey instead of bright white. I'm going to have to try to get later shots outside, I think, but it's rather hard where I live to find a suitable place for it. Maybe I could use our car bonnet/hood!!  Anyway, here's the first day's work.  Below is the shot I took just a few minutes ago after four sessions (and after all earlier photos were rejected for execrable quality!)  This one is quite bad enough, but those made it look good....


Some parts I'm happy with, some not so good, but I'm hoping that they'll look much better once things like sepals and stems appear.

Last night was the rehearsal, so I cobbled up a quick dummy cushion so that it could be used.  Here you can see my trialling two of my own rings on the mock up to test the padding.  What I've done is to cut, in effect, three squares of lightweight quilt batting and cut holes in the centre of two of them so that there's a distinct dip where the rings can lay safely.  A few people at the rehearsal actually thought this was the real thing and was really nice!!!=)  I was just thinking the other day how very easy many people are to impress....

Here's the dummy run of the 'rings bit'.  Marion (the bride) kindly agreed to let me trial the real rings to give the padding a thorough test, although this fabric is smoother than the real thing will be with embroidery standing proud and natural slubs in the silk.  As you can see, the best man is bringing the rings over.


The rehearsal was a very international event.  Above you have the bride (French) and groom (Malaysian), with the witnesses - the best man and his (Japanese) wife, as well as Sir (German) by the door checking the list of what happens when.  On the right is the chairman (sitting down) who will be giving the announcements in Chinese as well as English for the groom's family.=)  The second photo is the team discussing arrangements for the post ceremony catering.  Rod, seated on the right, was the perfect choice being unashamed to admit how much he LOVES his food!!=)

The chairman's wife had commented on what nice fabric the mock up cushion was and I said that, yes, if one were to trim it up around the edges, one could make it into something simple, but pretty enough.  So, that got me thinking about making some braids to trim up the edges of the real thing and these are the threads I fished out last night.  Of course, I won't be using them all and the choice of metallic will be influenced by which goes best with the final looks of the design.

The couple's rings are white gold, so silver coloured, so I rejected bright, yellow golds at once and left silver and the two soft golds out to choose from later on.

I also thought a few of these tiny beads would look nice around the finished design to add some sparkle.  They're the iridescent ones on a more or less clear 'base', (as opposed to a white basis) and look rather pretty.

So, still plenty to do, but the stitchery is progressing quite well and ideas are still flowing for making improvements.  More next weekend!

Text and images © Elizabeth Braun 2014

Saturday, 21 June 2014

Wedding Ring Cushion/Pillow Design Process

Today I want to share with you the first stages of the wedding ring cushion.  I've been working on and thinking about the design on and off ever since I was first told that the couple wanted a ring cushion instead of the usual something for their home.  I played around with some CQ style ideas, like the cushion I'd done years ago, but when I saw this design, I felt it was the right basis.

Fans of Helen M Stevens will recognise this as one of her pieces.  In fact, it's the second of the masterclass lesson pieces from 'Helen M Stevens' Embroidered Flowers' and these first two photos are taken directly from that book.

I couldn't use it as it is, as there's no room for the rings to sit, unless I was to hang them off one of the leaves, but that's a bit far out for my tastes!!  So, I needed to simplify it a bit and the first step was to get a photo of the outline in the book.

I then pasted the image into a Word document three times, each one a different size so that I could decide on the right scaling.  Here you can see print outs at an image width of 6"/15cm, about 5"/12cm and then at 4"/10cm.  It turned out that the middle sized one was the best fit for the size of square I plan to work in.

I wanted to keep both types of flower - evening primrose and herb robert, in the piece, so I needed to pull the central section down and eliminate the right hand evening primrose.  I also needed to pull the left hand flower back a bit in order to leave a good sized empty space in the centre of the design for the rings to sit in.

I placed some tracing paper over the middle sized print out and began to trace the elements I wanted to keep, moving the tracing paper round each time I needed something at a different angle.

I also added in some small herb robert flowers on the left hand side to make sure that the piece was balanced colour and content wise.

Why two tracings here?  The top one is the original one that I took from the book design and then transferred to a sketch pad (see below).  By the time it'd got this far, some of the leaf and small flower shapes had become a bit distorted, so I tidied up the outlines, added in the colours etc and generally finalised the design before taking a careful new tracing ready to transfer to the smooth, white piece of silk I have ready.


Above is the finished design, (although I may well be adding a stumpwork brimstone or other yellow type of butterfly in the top right hand corner), and below are the threads I've chosen resting on the white silk.  As you can see, I've invested in some DMC threads at long last!  The reason behind this is that, even if you have the whole of a stranded cotton collection, you simply can never have enough greens!


About ten years ago, another stitcher told me that she never liked mixing Anchor and DMC threads as they had a different sheen and I must say that, from comparing them in the skein, she's right!  It's not a huge difference and, in one strand work, probably won't show, but as the DMC shades are the shinier, I'm tempted to get the corresponding DMC yellow as that's the largest single colour area and would look good a bit shinier.  I'll make a final decision on that later when I see how some of the other colours are shaping up together.  After all, Trish Burr mixes them on occasion without issue, so I'll see how I feel about it anon.

Any experience and/or opinions on this one?

Text and images © Elizabeth Braun 2014

Wednesday, 29 June 2005


All Sewn Up!

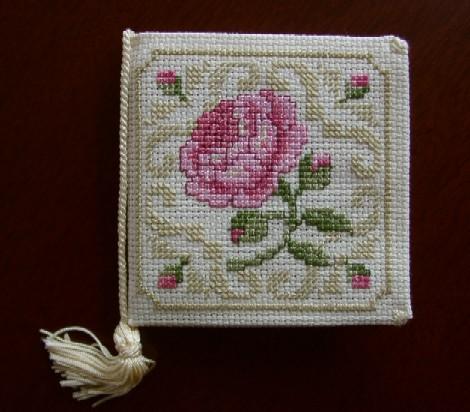
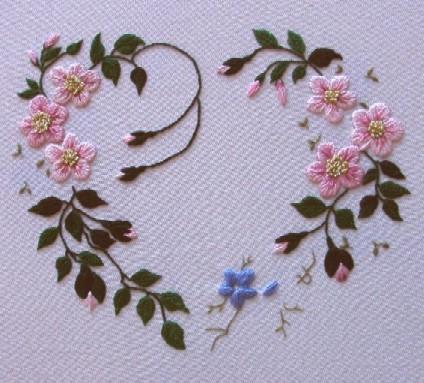
Both the rose heart cushion and the rose needlecase are now sewn up into what they're supposed to be and ready to be given to their prospective owners.=)


Nothing much else done today - no other project work and not likely to be until tomorrow. Never mind, 2 out of the 7 stitching projects are DONE, so we are talking major advances in the right direction. YIPPEE!!=)

Tuesday, 28 June 2005


Progress Update - Tuesday

This is the story so far on the rose heart piece. Yesterday, I did all the buds and the greenery near them. I also made a start on the blue flowers at the bottom.

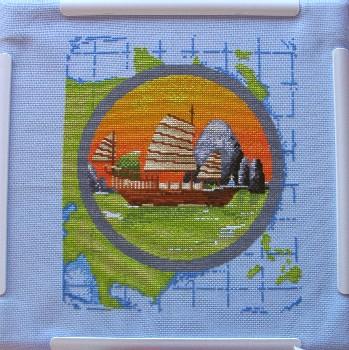
Here's the current state of the Chinese Junk cross stitched piece:


I hope to get the florals finished on the heart piece today and maybe get a few stitches in on the Junk. We'll see...... I also need to design the initials to go in the centre of the heart, which will be a bit of a challenge, but I've let fear stop me from getting on with these things for WAY long enough, so no more procrastination.

On the academic/linguistic project side of things. Yesterday evening I set up a simple, temporary (as it's very naff.....) homepage for the Phrasebook project and have got out the file for all that and related projects this morning. I'll do some sorting through that and make a plan of work for pushing them through to completion.=)

 
Google+