Saturday 28 April 2012

Thread Re-Organisation

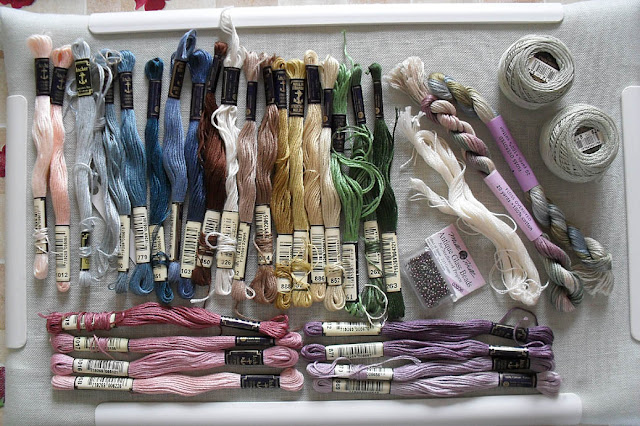
OK, first the disclaimer, this is NOT meant as a don't-you-wish-you-had-as-much-thread-as-me brag, but just a celebration of the fact that I finally got the new pearl #12 balls settled in to their new homes and did the necessary re-organisation of some of the rest of the threads in the process.  That bag of new threads had been hanging around for quite long enough and I really wasn't sure how I was going to go about fitting stuff in the various boxes in a logical manner.  I don't like having part of one type of thread here and the other part there, so this is more sensible, I feel.=)  The gaps you can see here, on the left at least, are for the three balls which haven't yet arrived from the on-line LNS - one more each in yellow, orange and green.


First of all I managed to fit all the pearl 12's into the drawer at the bottom of my main workbox.  This box now holds, basically, plain threads.  There are stranded cottons and coton à broder #16s in the central box section and rayons (Marlitt) and Pipers Silks cops in the right hand cantilever with black and white pearls etc on top.


In the left hand cantilever, I used to keep tools and wires in the top (which are still there), Carons and some Kreiniks underneath with the remaining Kreiniks at the bottom.  This meant that metallics were part in this box and part in the blue one, with one or two more in my machine threads tin.  Now the cantilever holds just pearl cotton #8 balls, which used to be part in the drawer with the old 12s and part in the blue box.  How they're all together and much more user-friendly.  I can see and be much more inspired by the colours this way.=)


Speaking of being inspired by the colours, I put all the metallics in the top drawer of my smaller 4-drawer set (which I will soon show, along with the larger one for fabrics and kits - as soon as the shelves in my room go up and all can be sorted out well).  I used to have all these Kreinik spools with only the label showing in my cantilever sections.  I could see the colour number and they were all ordered according to thread type/thickness and in numerical order, so it was tidy.  However, this is much more inspiring, don't you agree?


This is the view from the bottom, as there are two rows in there.  As you can see from both these shots, I've now arranged them according to colour family.


Finally, this is the box with the multi-coloured pearl cottons, both in #5 and #8, along with the Carons.  I don't often use those these days, so having them in my main workbox wasn't necessary.  Plain threads get the most usage, even if they're not as pretty as metallic and variegated ones.=)


Now, if that doesn't make you want to stitch, I don't know what will!!!=)

Text and images © Elizabeth Braun 2012

Tuesday 24 April 2012

Manicure Pouch - Finished Up!

At last, it's done and even worked out a little better than I'd feared, although I can't say it's quite what I would have liked, but putting piping around the edge was beyond me this time.  I could make the cording OK, but attaching it was more than I was prepared to risk with something that's meant as a gift.  Sometimes I miss City & Guilds ... (the experimental aspect, plus a room full of people who may have more of a clue, and a teacher, and the fact that it's only a piece of coursework and hasn't spoiled someone's pressie...)

So, as promised, here's the whole process:


First I cut some pieces of heavy interfacing to match and backed both the embroidered panels and the corresponding sections of the lining.  The reason for this, and the gap between the panels, was to produce a folio that wasn't too floppy and that could close well.


I next got the contents of the set out and laid them out on the lining, followed by pinning the elastic that would hold them in place.  I know this isn't really the most glam way of doing it, but I couldn't think of much else (except for things that were really too hard me to attempt at the mo).  It could be worse, I suppose..


Above is the elastic stitched in place and, boy, was it hard to keep it reasonably straight!  It had a real craving to go up at each end.  It does a little, but not too badly.


These two shots show (above) the embroidered bit and the lining tacked right sides together, and (below) the proper sewing in place around three sides and a little bit at the outer edges of the bottom as well, plus the excess fabric trimmed away.  What you can't see here (and I didn't take photos of as it was done in poor light) are the ties which are sewn in.  Of course, I didn't think it through properly the first time and ended up sewing one on the inside.  Duuh!  I'm wondering what's happened to my poor old brain of late....


And here is the finished item after having been turned the right way around again, corners pushed out, bottom edges pressed and slipped stitched in place, and a final pressing and rub over with a bit of Sellotape to get the dusty bits off that were beginning to make it look grubby.


(Edit in the summer after handover:  Rosie said, "You are amazing" in response to receiving this, but I think that refers better to my having remembered a many-years-old promise, than to my abilities...  Nice to hear, nonetheless.)

It feels good to have a proper finish and something I can cross off my 2011/2 Goals List, especially as I can't seem to get into my other pieces over much just now.  This is as far as I've got with the rabbit:


She who wrote the article on getting stuff finished is struggling to take her own advice.  Hmmm!=)

Text and images © Elizabeth Braun 2012

Saturday 21 April 2012

Sampler Hours 5 - 7

So, here I am, bravely negotiating the new Blogger interface to post the latest three photos on the current sampler project!!  I didn't realise the post form had been changed too, but so far I'm managing to find everything and, much as I want to dislike it (how stupid, but true!!), I'm finding that I'm pleased to see a longer post form on the page instead the of the previous scrappy little thing you had to forever scroll up and down.  At least now it's page long.  So, if you use Blogger and haven't posted since the changes came in, you'll see that next time.=)

The progress isn't as obvious as it was on the first four shots as the hardanger satin stitching is all in place and it's cross stitches that are - slowly, as it's very bitty work - growing around the outside of it.


Here's hour five which shows the completion of the Klosters and tulips, some of the darkest green cross stitching and half of the bullion knot flower centres.  I was pleasantly surprised at how smoothly they went as, although I love the look of them, bullions are not my forté.  I loosened the clips to work them as they're virtually impossible in tightly held fabric.


Hour six shows all the bullion centres done, all the darkest green 'x's in and some of the lighter ones started.  It was slow going with the crosses as they are bitty and I was also watching another Chinese history documentary, this time on the building of the Great Wall.

Which reminds me, I'm no great shakes at history, Connie and I too wasn't interested in it at school, or even at Uni for that matter.  I had to do it as part of my Chinese Studies course as some area studies/background modules were compulsory, but, apart from a bit of Mongolian history and culture in first year, I didn't select a single area studies module as an option.  Every single one was either a language (Japanese, Cantonese, Mongolian and Spanish - and, no I am NOT fluent in them all!  Can barely remember a word, in fact!), or some IT classes.  I've always been quite keen on computers.  However, I'm much more interested in the area studies aspect of Chinese these days and so I take in the occasional doc on the good old iPlayer!


This is the current status at the end of hour seven and here you see the lighter green completed and some purpley stitches as well (if you look carefully, that is!).  This bit was done whilst watching a travel documentary on hiking in Iceland!!=)

I've also been making some real progress on getting the roses finished up and should have that whole process ready to show on Monday.  One more stage to go now, but it's held up in the ironing pile at the mo as I can't slip stitch the last part together before pressing the edges.

Text and images © Elizabeth Braun 2012

Tuesday 17 April 2012

TAST Week 16 - French Knots

Hello all!  Another familiar stitch this week - French knots, so, again, more from the archives as I get on with the sampler in my actual stitching time (will post on that in a couple more days).

Lots of people have trouble with French knots.  On Sharon's TAST post for this week, she mentions the common pitfall of putting the needle, basically, back in the hole it came up through.  I've done that too, but that wasn't my major problem.  I had the needle facing the wrong way when I wrapped the thread and it was Sir who figured it out from the diagrams in one of my stitch books!!  How many of you ladies have been taught a stitch by your hubby??


This first one is a lovely stylized shoe from the now defunct 'Needlecraft' magazine that I worked as a wedding sampler for a young couple back in 2004.  It was one of my earliest freestyle pieces and contains a fair few knots, both of the French and the bullion variety.  You can see smaller ones on the lower left hand side section and larger knots made with more strands of cotton and more wraps around the top.


Many will remember this piece from the last post when I used the section just underneath to show some stem stitch sections.  The real attraction of this sample though, is the mass of French knots in varying colours and sizes all across the top and down the whole left hand side.  Knots are done in varying numbers of strands and also in coton à broder, not just regular stranded.  They're used for both flowers and leaves too.


Here's a small section of my cross stitch narrowboat from late last year showing how French knots can be used to good effect to create texture on the very flat surface of cross stitch.


Lastly, this one isn't so easy to make out as it looks like just chipping.  Well, I own bright check purl in silver and gold, but not in pink, so the pink lumps you can (just about) see are French knots worked in Coats Reflecta thread.  Yup, this is a close-up of one of the pieces featured in my header photos.

Hope that's provided some inspiration and enjoyment.=)

Text and images © Elizabeth Braun 2012

Saturday 14 April 2012

TAST Week 15 - Stem Stitch - a Round-Up

Again, I haven't worked new samples for TAST this week, as I know stem stitch so well that I didn't feel the need to and I haven't been feeling tremendously creative this week, so couldn't think of anything innovative to do with it.  So, I've dug into my archives again and here are four samples from previous pieces that show stem stitch worked in various ways and under various circumstances.  Three of the four photos have had to be scaled up (i.e. increased in size to 125% or 150%) and then sharpened a bit, so I hope there hasn't been too great a loss in quality.


This first one shows stem stitch as worked in a design by the well-known embroideress Helen M Stevens.  She uses stitches as long as one can reasonably get away with, given the curve of the line.  Alongside the stitches worked as poppy stems, here you can also see fine black lines worked in stem stitch as 'shadow lines', which help to create the impression of depth in her designs.


This second sample is from a Royal School of Needlework kit I worked back in 2005 and which, sadly, they no longer sell (there were some lovely designs available).  In the instructions, I remember the statement that 'well-worked stem stitch should look like fine rope'.  I can't say I quite cracked it on the oval shape here, but the single line isn't too bad!  It was done in Coats Ophir metallic.  The rest, of course, is couched and is Kreinik #7 Japan thread.


Here's a close-up of a WIP shot from the DMC stumpwork bee kit.  The reason I include this one is to show the problems that can arise from stem stitch worked on pre-printed fabrics - the print lines often show!  It's not an easy one to get around, esp as lines are almost always quite thick and rather dark, (although the RSN kit lines were in a gold colour - they were still too thick for some of the design specified stitches though).  I try to get around this one by using more strands of thread than stated in the instructions, but it's a constant hazard with linear stitches in kits.=(  If I ever do come to making my own kits, there will be no printed design as I find them of almost universally poor quality.  There'll be an outline to trace or something of that sort.  I'm not expecting to sell to beginners, so I reckon buyers will be able to manage to transfer the design themselves as well as I have with that type of kit!


This last sample is from my old City & Guilds pieces and is just a few stem stitch sections worked, I think, in a pearl cotton shade.  Or it could be a Coton à Broder....  Looks slightly twisted though, so I'm guessing at pearl cotton #12!!  I included this piece as it comes from a C&G sample that a lot of kind readers and photo sharing site viewers have enjoyed.=)

I had a great surprise last week when Sharon kindly featured me as one of the samples worth seeing.  I then felt that I hadn't really made enough of the satin stitch things that I have as I only used three samples and could have easily doubled it!!=)

Text and images © Elizabeth Braun 2012

Monday 9 April 2012

Sampler is WIP!

I've made a good start on the 'Sunshine and Flowers' Cross'N'Patch sampler design and I'm really enjoying it so far.  For some reason I didn't expect to.  Unusually for me, I started at the very top of the design, rather than in the centre - even Sir noticed that!  However, the working frame is so big that it was just plain easier to start at the top and I'm a bit wary of how I'm going to manage the central sections.  Besides, hardanger satin stitch is a nice and easy way to get into the design.=)

Here's my progress so far, shown in (roughly) hour long stitching sessions:


I can't believe how little I got done that first hour, but I know it was that long from the TV documentary on China I was watching on the Channel 4 iPlayer!!  It's very possible that I stitched very slowly as I was quite absorbed in that - reviewing much of the area studies modules I did in my Modern Chinese Studies degree!!  It made me want to get out the history books again, and so I will soon....

Anyway, Chinese history and society aside, not only did I only stitch three elements that first session, but I also got the cream 'tulip' bit wrong and had to re-do it in the second session!  I have two more of those to add now and they're all to have bullion knot stamens, so I need to have a quick practice on that one.  Wonder if TAST this week might be bullions??=)  Would that be good timing, or what?

Text and images © Elizabeth Braun 2012

Wednesday 4 April 2012

A Bit of This and a Bit of TAST

I managed to get my lazy self sufficiently motivated to do a few catch up stitch samples for TAST 2012.  The samples I did for weeks 11 and 12 are not very spectacular:

This is a small ribbed wheel, shown here rather larger than life, which I know next time to anchor the foundation stitches of better!  I was forever having to hold onto the first stitch as it had nothing to grip onto on the back.  It worked out passably for a first attempt and I do think this one has some potential, which I must explore more fully later on.  I liked the way Sharon had used part of a wheel to create shells and one of the other TAST participants used a half wheel to make a fan.  I want to try those out some time.


These are the samples for week 12, one each of barred chain stitch and alternating barred chain stitch.  I couldn't find this one in my stitch guide, so it was a new one for me on all fronts!  I used Sharon's instructions and had to keep referring to the photo for the placement of the working thread as the direction you have to have it going is rather counter intuitive!  Anyway, they worked out OK and I'm quite pleased with them.  I think I finally got the hang of it in the end.=)

Week 14 (or is to be called week 13??) is satin stitch.  I know this one very well as it's one of the very first things I learned to do when I learned any embroidery as a child.  Rather than work a few needle strokes on my naff Aida scrap, I thought I'd just share a few samples from past pieces that are worked in satin stitch.

This first one is worked in Pipers Silks and, with the exception of the stem stitch stems (!!), almost the whole piece was done in satin stitch.  As you can see here, the leaves were picked out with some straight stitches and the little wild strawberries with a couple of seed stitches in gold.


This one is from the ladybird and blackberries stumpwork piece (see Stumpwork page for the whole thing).  The leaves are basically directional satin stitch with a few touches of contrasting purple.  I rather like them.=)


Finally, here's some satin stitches worked as part of a hardanger WIP from back in 2005.  You can see the whole finished project here.


Now then, onto something else.  Cynthia asked me to show the pattern for the threads etc that I displayed in my last post.  I've posted it a couple of times, but there are already enough links to others posts etc, so I took  a new photo and, although the colours haven't come out too well (the main, framed piece here is actually lilac, but it looks more grey here.  I'm doing the green one instead), you can see the design OK.  Don't miss Cynthia's blog by the way.  She's recently completed one of those glorious Jane Nicholas stumpwork tile designs and is now back on with a sumptuous pomegranate piece.


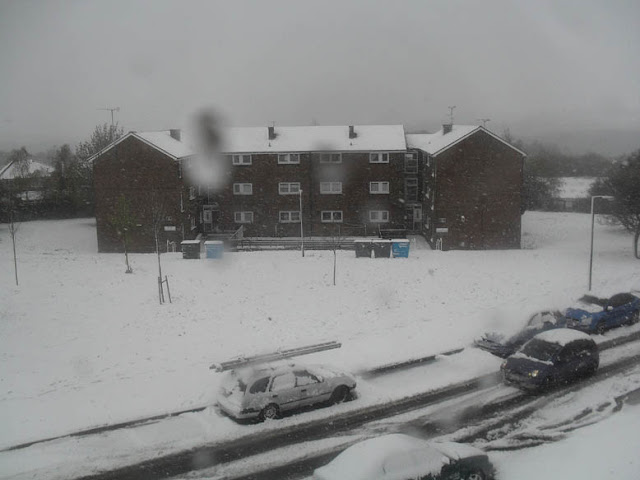
And the above is what we woke up to this morning!  I was so surprised that I actually exclaimed out loud!  I'd read something about snow on the BBC website, but thought it would be just northern Scotland.  So, that put paid to my trip out to the Meadowhall shopping centre and retail park (Hobbycraft!) today.  At least I got my TAST stuff done and even finished some mending.  It's melting away now after having come down for much of the day, so I may be able to get out for my shopping trip tomorrow??

Text and images © Elizabeth Braun 2012

Monday 2 April 2012

Things are a bit slow just now

I'm very behind with TAST - despite the catch up week and have only done one short session on the rabbit's head, which isn't going very well either, but then, much as I admire it, I think shading is not really my thing.

Anyway, I haven't been very well so have really just been reading a lot and doing the occasional bit of time wasting on-line, so no stitching.  I remember Sir telling me of a talk he'd heard that mentioned time wasting on-line and called it 'the Internet vortex'.  Your time just falls in and you never see it again!!  Good, isn't it?  I recently discovered a language exchange site as well, so that's not helping me be productive elsewhere.  Squads of Chinese girls want to be my language partners - I've never been so popular before!=)

Anyway, I have this to show you, which is the floss toss for the Cross'N'Patch 'Sunshine and Flowers' design I've been planning for my mum for about 3 years so far.  I finally got the fabric cut, framed and 'tried out' with all the threads.  I think it's rather nice, don't you?


I haven't yet put a stitch in on it....

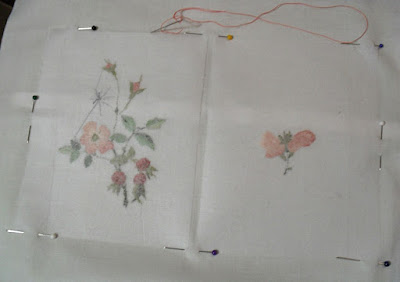
Here's something else as a taster.  It's one stage of the finishing up I've part done on the manicure pouch (the dogrose thread painting).  I plan to try and get that done this week if possible, strength allowing.


These are my stitching goals for the month:

* Complete the finishing up on the manicure pouch and post the whole process to my blog.
* Catch up with TAST and finish April also caught up, even if that means only doing one line of the new stitch on my doodle piece (which I thought I'd lost, but have just spotted under a WIP on my little table here)
* Work on and, preferably, complete the stumpwork rabbit piece.  This will move forward fine once I find my feet (developed some confidence) with it.
* Do some practice stitches for and get started on the rolled rose Brazilian piece, which has been waiting to be started for some months now.
* Make a start on stitching the 'Sunshine and Flowers' piece.
* Not directly stitching, but I want to get the shelves and so on organised in my study.   This includes a second and larger '4-drawer contraption' (!!!) which will hold all my fabric and will be a lot simpler and more user-friendly.  The smaller one is full already, but the top drawer, into which I've just shoved some of my metallics, needs more thinking out.  So, it's stitching related and, yes Monika, I will show it all when it's done. I've taken 'before' shots in the room.=)

At least I've got a secretarial/IT qualification out of the way now that was taking up time and getting on my nerves.  Assuming that I passed all the final 3 exams, I can now put that behind me.  I doubt I'll ever be able to use it as I haven't been able to work for around 4 years, but we'll see.  I now have my Monday afternoons back and plan to use this one to get some TAST work done as well as some language study etc.  I'm behind on my Chinese and German schedules.

FOR SARAH who admired my hardanger needlecase and wanted the pattern details:  I've answered you in the comments section of that post, but you mayn't have seen it.  The pattern was a free download from the now defunct Classic Stitches site.  That being the case, I can e-mail it to you if you provide me with an addy to send it to.  Please leave a comment on any post (you may prefer to use an old one), which I will see at once and, after having deleted your address from the public domain, I'll contact you to see which format you need, OK?=)

Bis bald  快再见  See you soon

Text and images © Elizabeth Braun 2012

 
Google+