Showing posts with label Needlepoint. Show all posts

Monday, 20 March 2017

Finishing up some older projects

I think many, if not most of us have some little itsy-bitsy things hanging around waiting for us to finish them, or finish them into something once the actual stitchery is complete.  I had a few of these and so, once all the wedding pieces were done, I had a bit of a finish-a-thon.

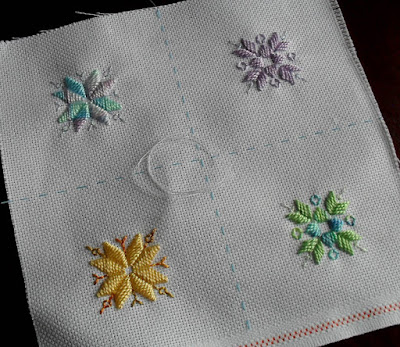
Long term readers may remember some, or even all of these pieces.  The first ones, the four tiny hardanger cards shown part worked here, I posted about around the turn of 15/16.  I had put the beading on sometime in the latter half of last year at some point when I actually wasn't in the depths of Intensive Project Hell, where I spent at least 3 months of 2016 (no wonder it was such a productive stitching year!), but I just hadn't mounted them into cards.


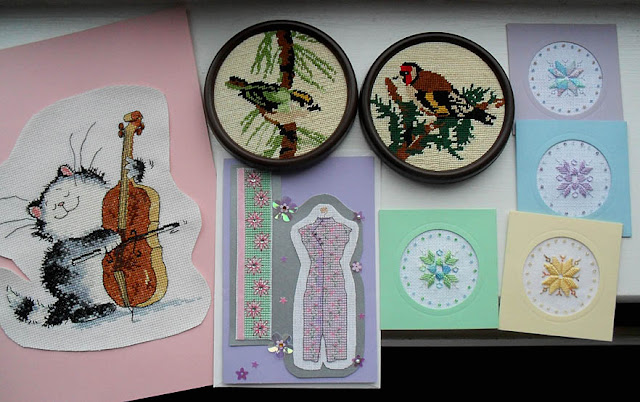
On one day, I mounted the four hardanger cards as well as the two old needlepoint birds in the frames that came in the kits, including giving them felt backings.

Mounting the other two cross stitches was quite easy using an iron as they're first put onto fusible webbing/Bondaweb, (which I had to buy a new supply of as I'd run out) but the paper not peeled off.  I then stuck them onto the relevant pieces of card, trimmed up the dress one and set the cat-a-cello (which my friend, Katy worked for me years ago) aside in a plastic pocket ready to go in the front of my long nelgected music folder.  I'm not exactly thrilled with the results of the dress card - it's too bitty and disjointed for my tastes, but I'm sure someone'll love it!

My project box was a great deal emptier for being able to move these eight items out!  There were nine things to be done at that point, the ninth being the lilac bellpull I shared a few weeks ago.

That's it for project catch up blog-a-thon - the series of almost 20 bi-weekly posts that have been needed to bring you up to date with my projects.  I hope you've enjoyed all these pieces. ☺. I can't promise such regular amounts of eye candy from here onwards, but there'll be things to see as I get pieces ready for this summer's show(s) and other things.  Let's see what we can come up with!

Text and images © Elizabeth Braun 2017

Monday, 7 November 2011

Some needling problems

And that's not all meant as a pun.  (Which bit is, you'd best decide for yourself!)


I've had this old needlecase for a few years.  I actually made it myself when I was in primary school class 3 at the tender age of around 7, so 1978/9.  I even remember being disappointed when I went wrong on the dark green/peach line, but it was rather a complex stitch for a tiny tot to do, no?  Well, my mum used it for years and then washed it out and gave it to me when I made her a new one back in about 2005/6.


You can see how untidy it'd got inside as well.  Bits of thread hanging around, flannel insert all rusted, needles all over the place in not much order, except that most of the top right section was blunts - tapestry needles.

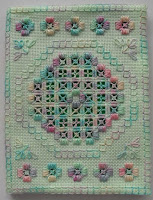
Whilst we were in Taiwan I worked a nice new one in a hardanger design.  I'd done an identical one in pink (which, OK, means it wasn't really identical.....) and gave it to my mother-in-law, and that after promising myself I was going to work that needlecase and NOT give it away.  I felt sorry for her as she'd had a rough time of it just previously, so I thought I'd give her the choice of colour and have the other one myself.  5 years later and it's been made up and waiting for needles for about the past 18 months.  So, last night I finally got around to populating it.

On the top left hand side we have tapestry needles in sizes 20, 22, 24, 26 and tiny 28s.  Under that come crewel/embroidery needles in sizes 10, 9, 7 (which is my preferred size - not too fiddly to work with), 5 and a couple of 3s.


Moving on to the right hand side and, from the top, three beading needles, 4 straw/milliners ones in sizes 3, 5, 7 and 9, then two other large needles that I don't really know what to call, followed by chenilles in sizes 18, 20, 22 and 24, then a few general sharps for sewing.

So, now I just have to get used to the sight of my new needlecase.  At least it's still green!

I've been thinking about the berries design and the problems associated with it.  First of all, the silk (backed with interfacing) feels very stiff and rather like paper.  Not nice to work on.  And, as I had it out of the frame for a while, there are nasty buckles in it, which just won't do.  You can see a bit of how it's got spoiled here.

Also, to be honest, I'm not that pleased with the design.  It's all over the place with no real sense of balance and I just can't find any enthusiasm to work it.  I started on the monogram a few weeks ago but, as the letters are half the dimensions of the ones I took the design from (Susan O'Connor's book), they really are too small to do properly and, when I tried, they just looked so scrappy that I would have done better when I was seven!  If not, then at least there would have been that as an excuse.  So, with all that in mind and the fact that silk on silk was really not at all practical for an everyday manicure set, (I mean, we're talking about a normal, modern woman here, not Lady Mary Crawley!!), I decided to take the piece out of the frame and take the whole thing back to the drawing board.  Perhaps a larger monogram with the berries around it??  I'll see what I can come up with.

In the meantime, I went through my kit box and fished these two out.


I could wish that, when kit makers were putting these things together, they'd spare some thought on how well the colours in the design go with the fabric they provide.  It always seems to be a cream colour that gets used (and the piece in the Brazilian kits is rather rough and rigid as well), but it seems to me that these purple roses and the light, blue-ish greens that are with them would be much better suited to white.  I laid the threads against three fabrics for comparison.  The first from the left is white (cool), then an antique white (neutral) piece, then the cream (warm) from the kit.  I know it doesn't show up as well as it could here (the original fabric is a bit yellower in reality), but the cool shades match the white so much better.  Colour is very important to me and I can't feel comfy with 'it looks OK' when it can look better!  Perfectionist?  Well, perhaps.  In some things anyway.  A pass grade won't do for me when a distinction is available.;)

I haven't started either yet, and I also want to have a go at a berry or two, so I can't say for sure what's coming next, but something will.  Soon....

© Elizabeth Braun 2011

Tuesday, 14 June 2011

5 Smalls, 3 Styles

Here are all my other recent finishes, most of which were worked on whilst I was working in Leeds recently.

The first is a cross stitched bookmark made for an elderly friend of ours, Charlie. He was delighted with it when we gave it to him last night.=)


Next we have the two printed canvas needlepoint kits that my mum found a few months before we went to Taiwan (about two years ago now!) and that I recently finished off and 'repaired'. On looking at the top one again the other day, I realised that there are more repairs to make, i.e. when I decided, in my 11 year old wisdom, that it wouldn't matter if one or two stitches went \ when all the others were / as it filled in the shape better....


Here's a wedding card done well in advance of the big day on 20 August this year. Now like me to get things done in good time (Prince Albert would have approved: 'It's always better to complete a task well ahead of schedule.'), so I now have this to keep clean and safe (in its envelope) for the next 2 months and to think of a gift to make.


The last photo shows the circular card mount I chose to put the silver and purple heart in. I took pix of both this and in a square mount and, as soon as I could see them side by side in my photo package, there was no contest on which looked best. (I'll post a better photo when I've taken one.)


Next task is to get on with the blackberries and make up the two cushion/pillow covers etc, but I'm rather busy preparing for software and secretarial exams (plus going to classes and so on) just now, so I mayn't get on as quickly as I'd like... So what's new, huh?!

Sunday, 24 April 2011

Two finishes. Yes, TWO!

So, I really got going this week and finished two things! No, not the narrowboat - I haven't had that much stitching time.=) In fact, I've only put a little bit of water in on that, so it isn't worth showing, but as I've run out of ideas for 'information posts' for the time being and have got back into my own embroidery work somewhat (could be famous last words.....), I hope to post WIP shots more often instead.=)

The first finish was the giraffe needlepoint that I was given as a 12th birthday present by Nicholas Cook! I remember him explaining why he chose it out of the series (it was the only one with a girl's name, bless him!). I decided not to save it to complete whilst I'm away doing exam work in May, but rather to make use of mum's sewing machine those 3 weeks and get it finished up into the cushion cover I've planned. I'm going to give to a disabled girl (I say 'girl', but she's not much younger than me!!) who likes cushions on her bed. Had I given it to a little girl as I'd originally thought, she would have grown out of it in time, but Georgina won't as she will always have a mental age of around 13, so it's perfect.


As you can see, it's got a bit warped. I know that this wouldn't be a problem had I been planning to frame it as the stretching process would correct it, but I'm going to be using it in a patchwork. Any ideas on how to straighten it up a bit??

Now then, here's the finish of the month, the water violets design! I put the last stitches, the water lines, in on this early yesterday afternoon. I decided to exclude the mayfly after all. It would have looked better, more balanced with it, but I really had had enough by then and just wanted it complete. So, this is it:


This too will be made into a cushion cover and I'll do that at the same time as the giraffe. I'll need to get some backing fabric for it. Oh, the design is in the right hand half of the cushion, in case you're wondering why I was doing such a long, thin cushion.=)

I've also got re-started to some degree on the goldwork viola (don't anyone dare call it a violin!). I put the felt padding on the chinrest yesterday, but I haven't finally decided on what to overlay it with. The options are rough purl and kid leather of which I have silver and gold. I know very little about goldwork, but I have two or three useful books that can help. I'm undecided on many parts of it - what threads to use etc. Anyone with more experience care to comment? Mary? Ruth?


All the best with a dog design, Linda and, go on, start a blog! If you do that kind of work, then I want to see it!=)

© Elizabeth Braun 2010

Sunday, 23 January 2011

Two weeks' work

Hi again! I'm back from our fortnight's working in Leeds and staying with mum. We managed to earn about enough to pay for the expensive car repair that became needed the day after we finished, so so much for our getting some needed funds on one side for foods, energy bills and so on over the next three months. Oh well, such is life. We're not dead yet, so, where's there's life there's hope.=)

I managed to get a fair amount done which away and, most usefully, away from the computer. DH said the same!! I got all the socks darned, all my journal reading up to date, reviewed one and a bit important brochures and got this done:


The last time this giraffe featured on here, the foreground was all completed (worked when I was given the kit as an 11th or 12th birthday present nearly 30 years ago!), but there were only a few lines of background stitching done. Almost done now.=)

I've no more progress to show on the other WIPs as I haven't touched them, except to move them from one place to another and put away the threads I'd finished with. However, I did make this card last weekend and, as it wasn't really art as such, i.e. not drawn or painted, I didn't quite know which blog to put it on, so here it is!!


If you take a look over on the Fluff, you'll find some tips on living on a budget over the next few days. Today's is an intro, there's a general money saving post tomorrow, full of all sorts of ideas and then there'll be one on cutting down on your grocery spend a day or so after that. Hope that will be of interest and use to some, especially as tomorrow's post contains some tips for craft work on a budget.=) I've also got some posting done on my language blog, for those of you with an interest in things like that.

Hope to be back soon with some more stitchy things to show.=)

Sunday, 3 May 2009

'Oriental Dress' progress and some childhood UFOs

I've been doing a little stitching again and have got the cross stitching on the Anchor 'Oriental Dress' cross stitch kit done. As this one relies quite a lot on back-stitching for definition, it's really been a lot of just 'blocking in', esp in that green and white sidebar. The design is interesting here as it's clearly a Chinese dress, but the whole colour scheme is rather more Japanese with it's subtle shades and lack of red! Not to say that Chinese clothes don't come in these shades, (they do as I have a lovely light pink jacket to prove it), but it's not what you would expect. If my memory serves me correctly though, I think the whole series this belongs to is done in the same sort of colour scheme. When the stitching is done, I'm going to make it into a small gift cushion/pillow to send to the couple who kindly put us up near the airport when we went to Frankfurt and had to fly into 'Frankfurt' Hahn (which is about 90 mins drive away from the city!!) It's a bit late, but as I started it at their place and I know she likes stitchery, it should go down OK. I can't quite get enthusiastic about this one as, well, I'm not even sure I like it that much! I only bought as a desk decoration for my old job, (should I have ever got a desk, which now looks most unlikely to have happened!!), but I thought I may as well have a short and simple project on the go at the same time as all the college stuff.

My mum's been clearing out her attic (with DH's help getting stuff down to start with) and came across some childhood UFOs of mine! Well, there were three UFOs and one piece that needs some re-doing in part. Here are three of them, a pair of needlepoint kits:

Just look at the back of the completed one! What a mess! I'm going to match up the needed colours, (probably just use cheap stranded cotton for the background needed on the 2nd one), and finish them ASAP. They've been washed as they were rather grubby from hanging around - I even had one on my wall at one point, but I now wonder how I dared - there are small patches where I have tent stitch going in the opposite direction!


This is another needlepoint kit that I'd almost done. I plan to get them all finished up and then framed, but I really don't know who to give this one to. I daresay it'll find a home though.=) In fact, I have an idea, I think I know a very sweet teenager who would enjoy this made into a little cushion for her room....


The last piece is a part-sewn lion from the 'Friendly Stuffed Zoo' pattern collection that I started when I was in the Girl Guides. I didn't get very far with it, but all the necessaries are there, so I can soon finish it off with the machine and either add it to our stuffed toy collection, (which probably needs giving away, esp as we are moving!), or turned into a gift. Will post that one when there's something recognisable to see on it. Anyway, these date back about 25 years to my pre-teen days!

I've also done another line on the band sampler and decided to miss out one that I didn't like. There's an unfinished line near to the top that I also didn't like much and missed out so far as it needs beads attaching and I'm leaving that 'til last. So, now I'm looking for something to fit in the 7 threads space there is left there.....

 
Google+