Thursday 22 March 2012

Small steps on the stumpwork bunny

Here's a little update on the stumpwork bunny.  I haven't done a great deal more on him - I've been busy with other things (including making a start on finishing up the dog rose piece and getting the fabric sorted and framed up for the counted piece), but here's what's been happening with him.

First of all was the padding of the body in the following two stages.  As you can see in the first photo, the felt is simply stab stitched into place.  The larger piece is then attached over the top to create a decent height.


The next stage was, following the rules of needle-painting, to outline the farthest element - in this case, the flatwork ear (the other is wired and raised).


The next stage was to shade in that back ear, for which I used three shades of bronzey-brown.  Then I moved on to outlining the whole head and body ready for filling that in.  The body will be stitched as normal just over the padding.  This is where the piece has been left for now.  The gap at the bottom is where the fluffy white tail goes.=)  (I'll be glad to get to that bit....)


I meant to do only 15 minutes on it today before moving on to making a start on the stitching on the 'Sunshine and Flower' design, but it took an hour to finish shading the ear (from where I'd left it the time before) and then do the outlining!  Never let it be said that embroidery is for anyone lacking in patience!

© Elizabeth Braun 2012

Friday 9 March 2012

Beaded Stumpwork Raspberry - felt padded

There are several ways to work berries, so I'm having a go at a few and sharing them.  This time we're going to be looking at creating a beaded berry with felt padding, which is worked all in one piece and means there's no need to be creating fiddly little slips!!

Here are the red beads all set out ready to work with.  I've really enjoyed the chance to get my bead collection into use.  I've finally got several packs that have been waiting for their turn open and been able to see how well (or badly) they fit in for certain elements.  That's always fun, isn't it?  In this case, the four packs on the right hand of the photo were good.  The two on the far left were either too dark or not translucent enough for the desired effect.


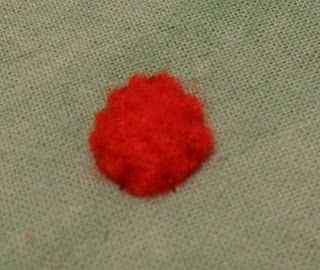
You start out by stab-stitching a small circle or oval of felt to the main fabric.  Here I've used a piece of grey to get things started, partly to preserve my red for when it was needed and partly as it was a denser felt, easier to work with than the red.


Over the top of the grey under layer was stab-stitched a larger red layer.


Once the padding is in place, begin to stitch down the beads.  I worked in a fairly random manner, selecting beads from the pack just as my hand went to them - so no deliberation about it.  Here you can see how one is rather too dark and one too opaque and almost orangey, so I didn't use any more of either.


Keeping working until you've densely covered the whole felt pad with red (or black, if you want to create a blackberry - or deep red for a boysenberry.....) beads.


This is what the berry looks like from the side


And this is the back of the fabric.  You may be able to see an indent where the firm stitching down of the beads has pulled the fabric up a bit.  I doubt this will be a problem, but, if anyone has any more detailed information on this, please feel free to leave a comment and I'll update.=)  I still have MUCH to learn and am willing for readers to teach me too.


Here's the finished berry, very much larger than 'life', completed with my first successful drizzle stitches.  I actually found those quite hard and gave up on them when I tried for the last tute, but I managed them this time.  They're worked in #8 pearl cotton here and, yes, I know, they still need some work!=)


I hope you've all enjoyed this pair of tutorials and have found them interesting and that they've inspired you to have a go.  Smaller berries can be made by sewing down fewer beads directly onto the fabric and, of course, you can also work them in French Knots and not use beads at all.  If you do have a go at one or more berries, please leave a comment with a link so I can admire your achievements.

© Elizabeth Braun 2012

Wednesday 7 March 2012

FanTASTic cheat!

Time to 'fess up, I haven't done the real thing with TAST for the last two weeks.  Truth is, I got into the idea of running a kit making business again and, as happened last summer when I first had the idea seriously, my interest in stitching more or less disappeared at once.  As soon as I decided to drop the idea each time, it returned!  Although I haven't done any again yet...  This trait is a real pain.  As soon as I have to, the 'want to' part goes AWOL - until I no longer have to, then I'm passionate about it again!!!  If you know a cure, please send me details express!

Still TAST weeks 9 and 10 being couching and running stitch respectively, I was able to fish out an old City & Guilds sample that contained some of each.  The contrast on this first photo is not that good - it's an old one.


The main shell itself is regular couching, although you can see that there is some split stitch 'thickening' the lines in some parts.  Better photo of detailed area now:


Here in the shadow line, from the bottom, we have a line of regular running stitch and just above it, two lines of whipped running stitch - one with just light grey, one with both shades.  The idea was that I was trying to create the impression of the lines getting lighter as the colour density faded towards the outer edge of the shadow.  I tried to do this with both density of stitches and darkness of the grey #12 pearl cottons used.

Speaking of #12 pearl cottons.  I put an order from Tandem Cottage and, although I managed to order mostly colours they didn't have in stock at the time and I'm waiting for most of them, one was in and I was disappointed to note that, although the quantity and quality was the same as ever, the packaging has changed. The new Anchor logo is neither here nor there, but I was sorry to see that they've now begun winding the #12 pearl cottons onto the same sized 'tube' as the #8, instead of using the old small ones.  I liked the smaller ones as they're much easier to store.  Sigh!  The price of a better colour range...=(

© Elizabeth Braun 2012

 
Google+