Manicure Pouch - Finished Up!
At last, it's done and even worked out a little better than I'd feared, although I can't say it's quite what I would have liked, but putting piping around the edge was beyond me this time. I could make the cording OK, but attaching it was more than I was prepared to risk with something that's meant as a gift. Sometimes I miss City & Guilds ... (the experimental aspect, plus a room full of people who may have more of a clue, and a teacher, and the fact that it's only a piece of coursework and hasn't spoiled someone's pressie...)
So, as promised, here's the whole process:
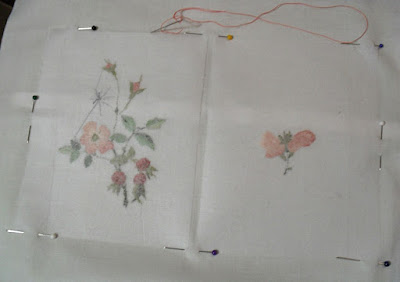
First I cut some pieces of heavy interfacing to match and backed both the embroidered panels and the corresponding sections of the lining. The reason for this, and the gap between the panels, was to produce a folio that wasn't too floppy and that could close well.
I next got the contents of the set out and laid them out on the lining, followed by pinning the elastic that would hold them in place. I know this isn't really the most glam way of doing it, but I couldn't think of much else (except for things that were really too hard me to attempt at the mo). It could be worse, I suppose..
Above is the elastic stitched in place and, boy, was it hard to keep it reasonably straight! It had a real craving to go up at each end. It does a little, but not too badly.
These two shots show (above) the embroidered bit and the lining tacked right sides together, and (below) the proper sewing in place around three sides and a little bit at the outer edges of the bottom as well, plus the excess fabric trimmed away. What you can't see here (and I didn't take photos of as it was done in poor light) are the ties which are sewn in. Of course, I didn't think it through properly the first time and ended up sewing one on the inside. Duuh! I'm wondering what's happened to my poor old brain of late....
And here is the finished item after having been turned the right way around again, corners pushed out, bottom edges pressed and slipped stitched in place, and a final pressing and rub over with a bit of Sellotape to get the dusty bits off that were beginning to make it look grubby.
(Edit in the summer after handover: Rosie said, "You are amazing" in response to receiving this, but I think that refers better to my having remembered a many-years-old promise, than to my abilities... Nice to hear, nonetheless.)
It feels good to have a proper finish and something I can cross off my 2011/2 Goals List, especially as I can't seem to get into my other pieces over much just now. This is as far as I've got with the rabbit:
She who wrote the article on getting stuff finished is struggling to take her own advice. Hmmm!=)
Text and images © Elizabeth Braun 2012


8 comments:
The manicure is a successful finish, and I think we all go through periods of struggling to follow our own advice - there's a line in Ovid's Metamorphoses "I see the better path and approve it, but follow the worse". It's a good guess that human nature hasn't changed in the intervening period!
Ooof, Rachel! That is sickeningly true!
The manicure set came out quite well. The important part is the embroidery on the outside, and it's just lovely.
I think you've done a fantastic job! The embroidery is beautiful and you've put the set together really well, well done!
p.s. if you need any help with stuff like piping, drop me an email and I'll see what I can do to help. I'm no expert sewist, but I have done things like that before.
Oh, you did a wonderful job with your manicure pouch. It's beautiful! The embroidery on it is just perfect.
Hugs,
Veronica.
Very interesting this step by step. And perfect finish :)
This manicure pouch has come out so well! Beautiful embroidery!
thanks for sharing your methods. your manucure pouch is lovely.
Post a Comment