
Wedding Dress Modesty Panel - design and sampling

My lovely young friend, Lauren, has been living mostly in Ghana for the last couple of years and, as often happens, met and fell in love with a nice, local chap. ☺♥☻ Their wedding date was set for mid December and she bought both of their wedding outfits on a long trip back to the UK.
However, there was a small problem with the bridal dress - it's a bit low at the back. By European standards, it was pretty decent, with the back finishing around about bra level, but by Ghanaian standards, it was too low for polite company. To quote the bride, "You can flash your boobs any day of the week, but one flash of a woman's back....!" So, in order to avoid offending local cultural sensibilities, Lauren sent me this photo of the needed 'addition' and asked me if I could help out with some embroidery to make it look like it was part of the dress. I quite liked the idea of the challenge and hopped on a train over to her parents' place in Halifax clutching my art box which I'd refilled with white, cream and silver threads of all types.
Here I am determining the size and shape of the panel - running carefully around the edge with some red sewing cotton and a tapestry needle so as not to jab into her!

After lots of holding up threads against the stitchery on the dress (which seemed to have been done in machine rayon and silver Jap style thread, then hand embellished), and then trialling some on some scrap net pieces, these are the threads that matched best with the original materials and survived the necessary work process.

I worked a couple of small samples, this one trialling a couple of different Madeira shades - ecru/2404 and off white, and also trying out some of the beads and sparklies Lauren and her mum, Janet - an accomplished seamstress, had bought in for the project. You might also notice a sort of 'haze' on this photo, as if there were a plastic bag or something underneath the net. Well, in a way there is, as I had to used Romeo water soluble stabilizer to work this piece. The net is quite fine, but nothing like fine enough to be able to hand work enough stitches on easily. Stabilizer provided the perfect solution. Once the stitchery is complete, you just rinse it out well.


Naturally, I took a lot of photos of the embroidery design on the dress and here are some of the details from those pictures. I used these not only to create a suitable pattern using motifs as close as possible to the originals, but also to get more of an insight into how they were worked and how best to set about it myself. NB These 3 photos are from the dress proper and are not my work.

After looking at it for a while, I traced around the edge of the panel and began to put together a design idea trying to make it look as 'at home' as possible. I'd been told not to worry as Lauren's hair would cover it much of the time and it just needed to give an idea, but, hey, this is me! It had to be spot on, right?? ☺
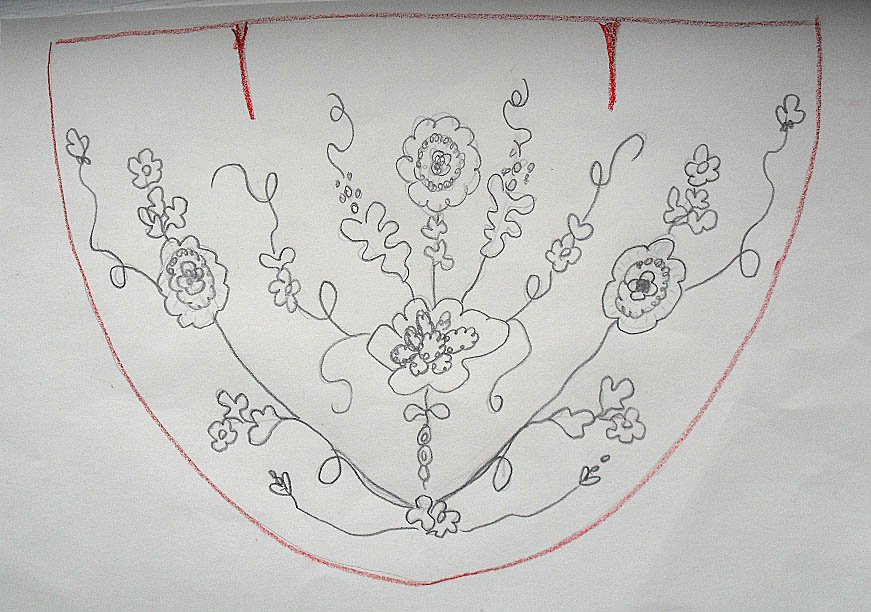
Here it is set up in the hoop after the tricky task of tracing the outlines onto the net using a fine black biro. You can clearly see the stabilizer here and also that I tacked along the top and bottom of the panel to keep it still. Given that the net's just that little bit stretchy, I had to be very careful not to have it held taut in the hoop, but to sit as it would in the dress. The Romeo 'fabric' acted as a stabiliser in that sense too.
Next time I'll show you the first stage of the stitching - the ecru silk flowers and leaf motifs.
Text and images © Elizabeth Braun 2017


5 comments:
I've been looking forward to this post. I love seeing your process on this piece.
A really fascinating challenge, as well!
Absolutely phenomenal needlework! Exquisite! You are so very talented! I don't think there is anything you cannot accomplish! Lovely.
Exquisitely done! Fabulous!
That's quite an undertaking. It is going to be beautiful. I love the white on white look.
Post a Comment