Re-designing a goldwork kit
This afternoon and evening (in 2 sessions), I made a start on the Benton & Johnson Goldwork String Instrument kit that I'd brought with me. I remember buying this one as part of a real retail therapy session - serious comfort shopping - during the time I was horribly unhappy doing my old teaching job, along with several others. I spent as much at that one stitching show as I would normally do at two or three - a whole year's worth!!
This is the original design of the kit, although the one I bought came with black silk as a background fabric, which is what I wanted.
 Anyone who knows much about modern string instruments would see at a glance that this design is far from accurate and, whilst I'm no expert player (yet!!!LOL), I do actually own a viola and so I always intended brushing this design up a bit. Well, a lot actually!! I know it's meant to be a generic sort of stringed instrument, but I wanted my own instrument represented in goldwork, so it needed a chinrest for a start. The body shape also needed refining and the pegs needed to match the strings - 4 strings (very badly placed strings at that) and 6 pegs, since when?? Recently, via the Pin Tangle blog, I came across a blog posting by Kirsty on the 'Feeling Stitchy' team on how to turn a photo into an embroidery outline and so I followed that wonderfully simple and effective process as follows.
Find the photo you want to stitch from. This is one I found via Google images of a viola, complete with chinrest (some are pictured without, some folk even play without one, but I'm not up for that!).
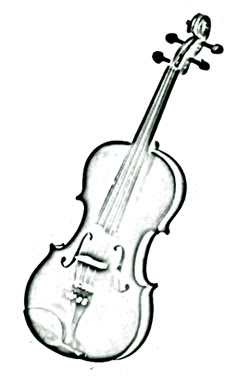
 Using Photoshop Elements' 'Filter' tab, select the 'Sketch' type and then pick the one that best suits your needs from the list given. The tutorial I read said 'Pencil Sketch', but my version doesn't have that, but the 'Photocopy' option worked beautifully and, after increasing the contrast to make the outlines really stand out, I was left with this image:
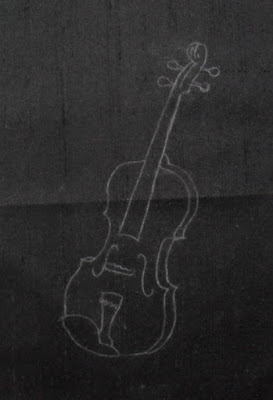
 Print it out at the relevant size, take a tracing from it and transfer the design to your background fabric in your preferred way (mine is good old dressmaker's carbon paper in white for dark backgrounds, although yellow would have been good too), the results of which you can see below.
 That's it, ready for stitching and not needing to go to all the fuss of drawing it out myself.=) This really is a good method, try it and see for yourself some time.


2 comments:
The redesign is lovely, much nicer than the original in my opinion.
Re the crease, very difficult to remove. I would try holding the fabric over steam and then pinning out as you would do for blocking a finished piece.
Thanks a lot for describing how to create the sketch using Photoshop from an existing Image. I was trying to do the same... Half the way I did. But never thought of adjusting the 'Contrast'. Thanks a lot...
Post a Comment