Designing and preparing to stitch a souvenir wedding pillow
If you've been following me on Instagram, you'll have seen this whole project through to completion, but, as it was a rush job, I didn't have time to blog it until now. IG is great as a whole post can be done in just one or two minutes, although the picture quality often isn't so good and the editing features are limited.
Less yadder, more project.
An old chum is getting married down in London next weekend and I wanted to make him a little something to mark his big day. I usually ask my friend(s) whether they would like a ring cushion, a wedding sampler sort of thing or something for their home (usually a scatter cushion cover). I had an idea of a sort of sampler for this couple as the groom's mum had told me that they already had a ring cushion, so I asked her to run it past them. I got a very useful design brief in return, that they'd like a wedding souvenir cushion, even if only a small one, with white roses, their initials and the date on, and could they have a sprig of lavender too?
Then it was time to move on to colour selection. I love this part of the process as I adore colour and getting just the right shade is important to me. Here you can see me with my Anchor colour chart, bags of DMC stranded and a white rosebud photo on my tablet to help me adapt the pinks from the book designs to the needed white (which is to be their main wedding flower). You can also see my new work area in this shot.
The next stage was to decide which colour was to go where on the thread painted elements, so I made some more copies of the flowers and planned out the shadings.
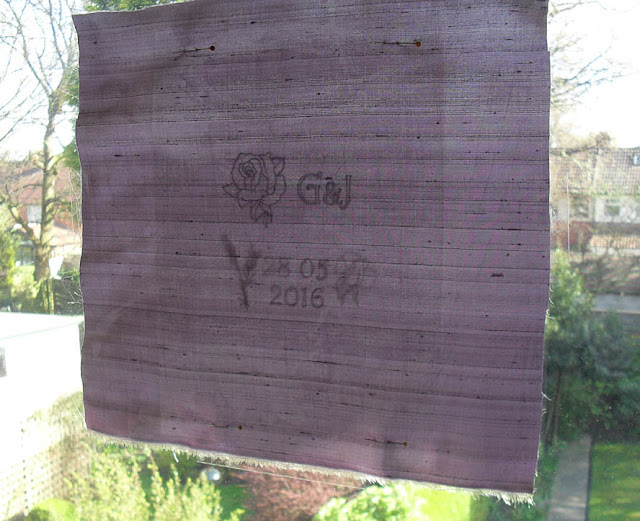
Following on from that was the tracing of the design onto this lovely lilac and light brown shot silk.
As you can see, I have zero fancy equipment. Apart from the fact that I have no room to store it, I resent spending money on a specialist item when things that I already have to hand will do just as well. I frequently use a window as a light box. In this case, I pinned the tracing (which I'd made good and dark) to the back of the fabric, then taped the whole thing to the window so that it didn't slip during the process. The pattern was drawn on the fabric using a 0.3mm black biro that I got in Taiwan.
Once the fabric was in the hoop and ready to start stitching, I began to feel that, not only was stranded cotton a little 'large' for the size of the design (the whole thing would be a square with 7"/22cm sides), but that I wanted more sheen. So, the choice was clear - switch to Piper's Silks. Each strand is about the same gauge as one of sewing cotton, so about half that of a strand of regular embroidery floss.
I have over 500 shades of stranded cotton, and only 117 of Piper's Silk, so I found my colour choices a little more limited, but, as usual, this only seemed to matter when it came to greens and neutrals. Funny how other colours can seem to substitute for near shades quite well, but greens, browns and greys always have to be right. I have 50% again as many greens as most other shades, but still had to make do somewhat. I nearly ordered some more, but remembered my crafts No Buy in time!!! I'd also have had to buy more storage for them, which wouldn't have been good. I also could foresee a saving in stitching time as there's only one 'white' in Piper's, but two in Anchor!!
Next post on this project will show the working of the lavender and the rose greenery. Hope you like the look of this piece so far! =)
Text and images © Elizabeth Braun 2016


3 comments:
Your colours look lovely, looking forward to seeing it progress. I made a light box from Christmas battery lights and an Ikea picture frame, works pretty well :-)
So much more fun working in silk, though!
Hi Elizabeth, I'm interested in using one of your photos for a spread in MaryJanesFarm Magazine (maryjanesfarm.org). Would you be so kind as to shoot me an email so I can explain in further detail? Thanks so much!
Post a Comment